Photo by Jonathan Coward for Herb
Here’s How To Roll A Braided Joint That’s Sure To Impress
Can’t braid hair? Don’t worry, you can still learn how to roll a braided joint.
For many herbivores out there, there is no greater simple pleasure than an excellently rolled joint. Forget machines and fillable cones. Good joint rollers are few and far between.
Constructing a smokeable joint is an excellent skill to have for any situation, so in this segment, we’re going to give you some top tips on rolling a truly impressive piece.
Today’s focus is essentially three joints rolled into one, the braided joint.
What You'll Need
A Rolling Tray
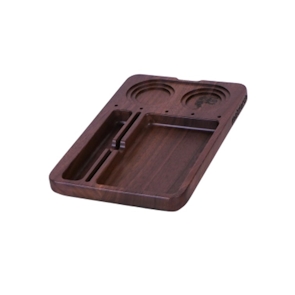
When rolling, you might want to keep everything organized by using a rolling tray. The Jay Mill by Matriarch has lots of special compartments that make your life way easier.
It will keep you from making a mess while looking pretty sleek. Its extra big rolling compartment will help you take care of the messy leftovers for a second round.
Rolling Papers
For your braided joint, you’ll need king-sized papers. We recommend getting Zig-Zag’s King Size Papers because of their quality and their unique organic hemp blend and rice paper.
A Grinder
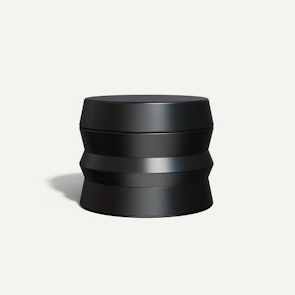
As with all jays, it all relies on having your flower well ground. I’d recommend using the KLIPgrinder from HØJ since it slices instead of just grinding your favorite flower. This makes it hit even harder by preserving the trichomes when you light it up.
Flower
You need at least 2 g of quality flower for this joint. If you feel like trying something new, we recommend the Delta-8 Strawberry Banana Kush from Botany Farms.
What To Do
Rolling a braided joint takes some patience. So, if you are in a rush or dislike small details, this joint may not be the best project for you.
For rolling-savvy individuals, this joint can be constructed in under 15 minutes. If you tend to fumble with your rolling, however, expect this project to take some trial and error.
Once you get going, your hands will be busy. So, it’s best to gather all of your materials before you start.
Step 1: Roll Your Three Individual Joints
It all starts with the basics. Before you can get to your braided joint, you’ll need to grind up your flower and roll three separate regular joints.
While this is an easy task for veteran herbivores, rolling three uniform joints in a row can be a tricky feat for cannabis newbies.
To get started, separate out three rolling papers. Position the paper so that the glue side is on top and facing toward you. Divide the two grams of ground flower as evenly as possible between the three papers.
Rolling papers typically feature an indentation in the middle, which is the perfect reservoir for your bud.
Making sure to evenly space your flower along the length of the paper, begin to tuck and roll. These joints will be a little on the slim side, but the slenderness will help during the braiding process.
You’ll also want to avoid rolling each joint too tightly. The tighter the joint, the more difficult it will be to braid.
It’s also important to avoid using a crutch or filter tip in these joints. You will be adding one later in the process.
If you would like additional information on how to roll an excellent joint, check out the full tutorial here.
Step 2: Bind The Joints Together
Take your pack of paper and cut or tear a glue strip of a new paper. Combine the three individual joints into a pyramid shape with two at the bottom and one resting the middle, and begin to wrap the glue strip around the filter tips of the rolled joints.
Holding onto the end of the joint, take your cut glue strip and give one end a lick. Begin to adhere it to the end of one of the braided joints.
Then, slowly wrap it around the filters of the joints, licking as needed. The end bind should be fairly tight and secure.
This is one of the most important step because if the filters are not relatively even, they’ll pull at different times at the joints will burn unevenly, so be sure to take your time securing them in place.
Once the joints are firmly secured together, you’re ready to start braiding.
Step 3: Braid
Next comes the braiding. Before you begin, it’s best to cut off the long glue strip on your leftover rolling paper. You will be using this glue strip to bind your joint after braiding.
If you have never braided anything before, the process can be a little challenging.
Once you’ve secured your tip, however, you can follow a few simple directions. With the joints facing you vertically, mentally label each one either one, two, or three.
Now, you’re ready to start the braiding process. To get your braid going, it may be helpful to follow this simple pattern:
- Cross joint one over joint two.
- Cross joint three over joint one.
- Cross joint two over joint three.
Repeat this pattern until your joint is fully braided—one over two, three over one, two over three.
Of course, if you already know how to braid than this pattern is unnecessary. Further, if this pattern is confusing, then it may be helpful to watch a video.
Step 4: Twist The Ends Together
The final step of your braided joint is to bind the end. Fortunately, this is simple. Once you are through braiding, gently smash the tips of all three joints together with your fingers.
Continue twisting and sealing, just like you would for a normal joint. If all step were followed correctly, you are now the proud owner of a beautiful monstrosity, the braided joint.
Share with your friends (or take it all to the face if you prefer) and enjoy!
Herb Recommended Products:
READ MORE


